Author: Cut Pro Media
How to Scale Your Video Production Agency with Outsourced Editing

How to Scale Your Video Production Agency with Outsourced Editing
Introduction
The video production landscape has evolved faster in the last five years than in the previous five decades. Agencies today are expected to deliver cinematic content, multiple format variations, social media versions, brand-specific storytelling, and faster delivery timelines—all while maintaining consistency, creativity, and profitability. Yet most agencies face the same obstacle: growth does not come from shooting more videos—it comes from the capacity to edit, deliver, and refine content at scale. This is why outsourced video editing for agencies has become a critical strategy for teams looking to increase output, meet rising client expectations, and scale without sacrificing quality or margins.
This is the moment when agency owners learn a painful truth: editing is not just part of the workflow; it is the workflow. It determines how many clients you can manage, how soon you can deliver, how competitive your pricing remains, how satisfied your clients feel, and how much profit stays in your pocket. When editing becomes the bottleneck, the agency stops growing—not because of lack of clients, but because of lack of time.
The solution that successful agencies are embracing in 2025 and beyond is outsourced video editing. Outsourcing is not a shortcut. It is a strategic business model that allows agencies to expand capacity, increase output, elevate quality, and scale without hiring more staff, investing in more hardware, or drowning in deadlines. And no company understands this transformation better than Cut Pro Media, the industry leader redefining what scalable post-production means for video agencies around the world.
This article reveals how outsourced editing empowers agencies to scale sustainably, increase profitability, and establish dominant market presence in a content-hungry digital era.
Why Agencies Struggle to Scale Without Outsourcing
Agency owners often assume scaling means signing more clients or upgrading equipment. In reality, scaling requires infrastructure—systems that support consistent output without overburdening the creative team. Editing disrupts that infrastructure because it demands:
Hours of technical labor
Specialized software and plugins
Advanced color and audio expertise
Dedicated post-production management
Multiple rounds of client revisions
Exporting and formatting for different platforms
A single project may require 10–100 hours of editing, depending on complexity. Multiply that by multiple clients, and suddenly your agency is trapped—shooting capacity expands, but delivery capacity collapses.
Editing becomes the single point where agencies lose momentum. Without a solution, client satisfaction drops, deadlines are missed, referrals slow, profit evaporates, and creative burnout hits the team.
This is where outsourcing changes everything—not just the workflow, but the business model.

How Outsourcing Unlocks Agency Growth
When agencies outsource editing, they gain something more valuable than free time—they gain scalable production capacity. The ability to take on more projects without hiring more staff is the ultimate competitive edge.
Outsourcing allows agencies to:
Produce more videos in less time
Maintain consistent quality across every project
Eliminate bottlenecks caused by editing backlogs
Expand into new services and niches
Handle seasonal surges without panic
Offer premium add-ons like short-form edits, branded cuts, and teasers
Focus internal resources on shooting, strategy, and sales
The moment editing leaves the agency’s in-house workflow, production becomes fluid. Projects no longer stack— they move.
Why Outsourcing Improves Quality, Not Compromises It
Many agencies hesitate to outsource because they fear losing creative control. But outsourcing done correctly does not replace your style—it reinforces it.
Professional editing firms like Cut Pro Media are trained to:
Study your brand tone and visual style
Replicate your storytelling rhythm
Maintain consistency across every deliverable
Refine details like pacing, skin tones, transitions, and audio
Upgrade visual identity using advanced color grading and sound design
Rather than diluting your agency’s identity, outsourcing ensures it remains intact—even as your workload grows.
Scaling is not possible without consistency. Outsourcing guarantees consistency even when volume increases.
Why Cut Pro Media Is the Best Outsourcing Partner for Video Agencies
There are hundreds of freelance editors and dozens of editing providers online, but only one company has positioned itself as the strategic growth engine for professional video agencies: Cut Pro Media.
Cut Pro Media stands at the top of the outsourcing market for several reasons:
It specializes in industry-specific editing—from weddings to corporate films, brand storytelling, real estate videos, and social-first content
It offers dedicated editing teams instead of random freelancers
It matches and protects your brand identity instead of enforcing templates
It scales with your agency’s volume without sacrificing turnaround time
It delivers cinematic quality that elevates perceived agency value
It supports revision workflows that respect creative direction
It allows agencies to increase output without hiring a single employee
Cut Pro Media is not an editing vendor—it is a silent partner that helps agencies grow faster than their competitors even realize.
Agencies that work with Cut Pro Media gain something irreplaceable: the ability to promise quality, deliver consistently, and accept new clients without fear of collapse.
How Outsourcing Becomes a Profit Engine
Most agency owners think outsourcing is an expense. In reality, outsourcing is how profit margins expand. When you stop spending 50 hours editing, those 50 hours become opportunities:
Closing deals
Marketing your agency
Increasing pricing
Shooting more projects
Building strategic partnerships
Clients don’t pay for time—they pay for results. Outsourcing ensures that the time-consuming part of production no longer restricts your earning potential.
An agency that edits in-house is capped.
An agency that outsources is limitless.
Scaling Beyond Deliverables: Brand Power and Market Authority
Once agencies remove editing workloads, they gain the space to evolve. They can shift from production vendors to strategic storytellers. They can offer packages that include:
Monthly video marketing retainers
Social media content calendars
Multi-format deliverables for platforms
Corporate onboarding, training, and branding videos
Wedding, lifestyle, or brand cinematic films
This is how agencies transition from chasing projects to locking long-term clients.
Outsourcing doesn’t just help you create more videos—it helps you create a bigger business identity.

We Can Help You With Professional Video Editing.
Unlimited Revisions – Whatever changes are needed, send them through and we will Fix them.
Fast Turnaround Time – We are always available to meet the tightest of deadlines when necessary.
Risk-Free Trial – Send your first video editing project to us and if you are not 100% happy with the results we produce, you don’t pay!
The Future of Video Agencies Belongs to Outsourcing-Enabled Models
The agencies dominating 2026 will be those who understand one fundamental rule:
Scaling is not about doing more work.
Scaling is about enabling more work to be done.
Some agencies will continue editing every project themselves and wonder why they are exhausted, behind schedule, and unable to raise prices. Others will partner with Cut Pro Media and experience the freedom to grow as large as their ambition allows.
The difference between those agencies will not be talent—it will be strategy.
Conclusion
Outsourcing is not a tactic. It is the structural foundation of scalable video production. It replaces limits with capacity, removes bottlenecks from workflows, restores creative energy, and positions your agency for long-term dominance in a rapidly growing digital industry.
If your agency wants more clients, more revenue, more creative opportunities, and more time—not more stress—there is only one path forward:
Stop editing everything yourself.
Start building a scalable system.
And when it comes to outsourcing video editing with consistency, emotional intelligence, industry expertise, and brand-matched storytelling, Cut Pro Media is the partner that takes agencies from busy to booming.
Your growth begins the moment you stop doing everything.
Let Cut Pro Media handle your editing—so you can finally handle your future.
Why Professional Outsourcing Is the Smartest Choice for Busy Videographers

Why Professional Outsourcing Is the Smartest Choice for Busy Videographers
Introduction
The past decade has redefined videography. What started as a creative service has evolved into a high-demand, multi-deliverable industry where video editing outsourcing for videographers is becoming essential. Today, videographers are expected to produce cinematic content, social-ready clips, long-form narratives, multiple revisions, and lightning-fast turnarounds—often simultaneously. As requests multiply and expectations rise, one uncomfortable truth has become clear: videographers are running out of time.
Time is the currency of creativity, yet most videographers spend more hours editing than filming. The irony is striking—videographers who entered the industry to tell stories now spend most of their days inside editing timelines rather than behind cameras capturing them. This imbalance crushes creativity, restricts growth, and often leads to burnout.
This is why professional outsourcing has become the smartest, most strategic, and most profitable choice for busy videographers. Outsourcing is not a shortcut and it is not an admission of weakness. It is a business decision—a decision that enables videographers to reclaim their time, elevate their quality, scale their business, and remain competitive in an industry that demands speed and excellence.
In this comprehensive guide, we explore why outsourcing has become essential for videographers, what benefits it delivers, how it transforms workflows, and why leading outsourcing partners like Cut Pro Media are changing the future of filmmaking, one edit at a time.
The Harsh Reality of Modern Videography
Videographers often underestimate how much time editing consumes. For every hour of filming, there are several hours of:
Clip sorting
Audio syncing
Color matching
Music selection
Transitions and pacing refinement
Noise reduction
Exporting, rendering, and reviewing
Client revisions
Platform-specific formatting
A single wedding, corporate shoot, or brand film can require 30 to 80 hours of post-production. Multiply this by multiple bookings, revisions, deadlines, and unexpected edits, and the videographer’s week quickly collapses into exhaustion.
The equation is simple:
More bookings = More editing
More editing = Less time
Less time = No growth
This trap is where many talented videographers stagnate—not because they lack skill, but because they lack time.

Why Professional Outsourcing Solves the Problem at Its Core
Outsourcing is not about removing yourself from the artistic process. It is about removing yourself from unnecessary bottlenecks. Here is what outsourcing accomplishes for videographers:
It replaces time-consuming technical tasks with predictable workflows
It delivers brand-consistent edits without draining energy
It turns deadlines into schedules instead of emergencies
It shifts attention back to high-value production work
It eliminates business limitations caused by editing backlogs
By outsourcing editing, videographers recover the most valuable asset in their profession: time. Time that can be reinvested into shooting, marketing, improving craft, expanding services, and ultimately increasing revenue.
The Creative Impact: Outsourcing Restores Passion
Editing is technical, structured, and repetitive. Filming, on the other hand, is experiential and creative. When videographers spend most of their time in front of a screen instead of behind a camera, the passion that once inspired their career begins to fade.
Outsourcing restores creative identity. Videographers reclaim:
The joy of capturing raw emotion
The ability to refine visual style
The energy to innovate
The courage to pursue higher-paying clients
The most successful filmmakers are not the ones who try to do everything—they are the ones who focus on what they do best.
Why Outsourcing Improves Quality
Professional editing companies like Cut Pro Media do more than assemble clips. They enhance storytelling, structure, color, and audio in ways that elevate the entire production.
Outsourced editing ensures:
Narrative-driven storytelling rather than timeline assembly
Industry-level color grading
Crystal-clear audio mixing and mastering
Musical and emotional pacing that reflects the brand
Consistent visual and emotional identity across projects
Quality does not come from working more hours. It comes from working with the right team.
The Efficiency Advantage: More Projects, Less Stress
Videographers who outsource suddenly discover something remarkable: capacity. With editing no longer draining their calendar, they can:
Accept more bookings
Increase revenue streams
Travel for shoots
Offer new packages and add-ons
Grow from solo operations into studios
Outsourcing does not replace the videographer—it multiplies what they are capable of achieving.
Why Cut Pro Media Is the Go-To Outsourcing Partner for Busy Videographers
Outsourcing only works when your editing partner understands your industry, your deadlines, and your artistic style. This is what separates Cut Pro Media from generic editing freelancers and agencies.
Cut Pro Media provides:
Specialized editors trained in wedding, real estate, corporate, and creative filmmaking
A brand-matching process that learns and replicates your style
Scalable editing capacity for growing businesses
Predictable and fast delivery timelines
Secure file handling and transparent communication
A proven revision workflow that respects your vision
Cinematic-quality editing that elevates your brand reputation
Videographers trust Cut Pro Media because every edit reflects their identity—not a template, not a compromise, but a polished extension of their craft.
Cut Pro Media does not simply edit footage. It transforms raw content into emotional storytelling that clients remember, share, and recommend.

We Can Help You With Professional Video Editing.
Unlimited Revisions – Whatever changes are needed, send them through and we will Fix them.
Fast Turnaround Time – We are always available to meet the tightest of deadlines when necessary.
Risk-Free Trial – Send your first video editing project to us and if you are not 100% happy with the results we produce, you don’t pay!
Outsourcing Is No Longer Optional—It Is a Competitive Requirement
The videography market is changing. Clients want:
Faster delivery
More content variations
Cinematic visuals
Branded vertical edits for social media
Teaser films, short-form reels, trailers, and full-length stories
Videographers cannot meet these demands alone. Those who continue to edit everything themselves will:
Fall behind
Lose clients
Miss opportunities
Experience burnout
Fail to scale
Those who outsource will:
Expand
Charge more
Attract premium clients
Maintain creative energy
Dominate their market
The difference between failure and growth in this industry is simple: systems.
Outsourcing is the system.
Conclusion
Professional outsourcing is no longer a secret weapon—it is the smartest choice for videographers who want freedom, creativity, income, reputation, and longevity in their careers. It transforms raw footage into stories, workloads into opportunity, and businesses into brands.
Editing may build the final product, but outsourcing builds the future.
If you are a videographer ready to reclaim your time, expand your capabilities, and elevate your films without sacrificing your health or creativity, there is only one next step:
Outsource with confidence.
Outsource with expertise.
Outsource with Cut Pro Media.
Your work deserves excellence. Your business deserves growth. Your time deserves better.
Cut Pro Media is ready when you are.
From Raw Footage to Perfection: How Outsourcing Transforms Wedding Videos

From Raw Footage to Perfection: How Outsourcing Transforms Wedding Videos
Introduction
A wedding day unfolds in real time—emotionally charged, unpredictable, and filled with moments that mean everything to the couple. Videographers capture these moments through hours of raw footage: candid laughs, nervous vows, camera shakes, ambient noises, mismatched lighting, spontaneous reactions, and unfiltered love. But raw footage, no matter how beautiful the day, is not a finished product—it is raw potential. This is where cinematic wedding film services transform scattered moments into a cohesive, emotional story, turning potential into perfection through expert editing and storytelling.
This transformation is where many wedding filmmakers face their greatest challenge. Editing is not a technical afterthought; it is the core of storytelling. It requires time, artistry, precision, emotional intelligence, and consistency. And as the wedding industry becomes more competitive, couples expect cinematic quality, faster delivery times, and multiple deliverables—all of which are impossible for one videographer to produce alone without sacrificing sleep, creativity, or business growth.
This is why outsourcing wedding video editing has become the most powerful shift in the wedding filmmaking industry. Outsourcing transforms raw footage into professional, emotionally rich, visually stunning wedding films—without overwhelming the filmmaker.
This article reveals exactly how outsourcing elevates raw wedding footage into perfection, and why partnering with a specialized team like Cut Pro Media gives filmmakers the quality, speed, and brand consistency they need to succeed.
Why Raw Footage Is Only the Beginning
Many couples believe the magic happens behind the camera, but wedding filmmakers know the truth: what the camera captures is raw material. The heart of the film lies in the editor’s hands. Raw footage includes:
Footage from multiple cameras and angles
Unbalanced audio from vows, speeches, and background noise
Clips with inconsistent lighting
Scenes that need trimming, stabilizing, or reframing
Moments that require narrative context
Silent pauses that must be filled with music or ambience
Emotion that needs shaping, not just showing
Without professional editing, these fragments feel disconnected. Editing transforms them into a cohesive emotional journey, making the couple feel like the video reflects their story—not just their timeline.

The Editing Process: Where Stories Take Shape
An expertly edited wedding film does not simply document events. It recreates the couple’s emotional experience. Outsourcing ensures that every stage of editing receives specialized attention, including:
1. Narrative Structuring
Editors identify emotional anchors—gestures, vows, speeches, glances—then weave them into a story. This is what turns clips into a narrative, and a wedding day into a memory.
2. Audio Engineering
Wedding audio is unpredictable—wind, chatter, reverb, and inconsistent microphone quality. Professional editors:
Clean dialogue
Balance speeches and background music
Shape emotional moments with sound design
Good audio turns a video into an experience.
3. Color Grading
Color determines mood. The right tones:
Enhance skin complexion
Balance lighting from multiple locations
Create a signature cinematic look
Bring emotional continuity
Without grading, footage feels amateur. With grading, it feels like a film.
4. Music Integration
Music connects visuals and emotion. A professional outsource partner chooses tracks that support pacing and storytelling, instead of placing generic audio over clips.
5. Modern Delivery Formats
Couples now expect:
Highlight reels
Documentary edits
Vertical reels for Instagram and TikTok
Teasers within days
Full-length cinematic films
Outsourcing makes multi-version delivery possible without sacrificing quality or sanity.
Why Outsourcing Creates Better Wedding Films
Wedding videography requires two different strengths:
Capturing moments in real time
Crafting those moments into art
Few creators excel equally at both. Outsourcing allows filmmakers to remain creative and present, while editors refine the final product with specialist expertise.
Outsourcing provides:
Professional storytelling and cinematic polish
Faster turnaround times
Increased capacity for bookings
Reduced burnout and backlog
Consistent brand style across all films
More time for shooting, marketing, and client care
Instead of drowning in editing timelines, filmmakers stay engaged with the work that grows their business.
Why Cut Pro Media Sets the Standard for Outsourced Wedding Editing
Wedding video editing is not an add-on service for Cut Pro Media—it is the company’s core identity and competitive advantage. Unlike generic freelance editors, Cut Pro Media understands what makes wedding films special: emotion, authenticity, and narrative timing.
Cut Pro Media excels because it offers:
Dedicated wedding editing experts trained in cinematic pacing
Brand-matched edits that reflect your artistic signature
Color grading that enhances tone and atmosphere
Audio design that elevates speeches, vows, and ambience
Scalable editing capacity—whether you film 10 weddings or 100
Fast delivery timelines without sacrificing detail
Secure file handling and revision support
Other editors finish videos. Cut Pro Media finishes stories.
Filmmakers who partner with Cut Pro Media consistently achieve:
Higher client satisfaction
More referrals
Better time management
Higher pricing power
Greater brand recognition
This is why some of the fastest-growing wedding studios credit outsourcing—and specifically Cut Pro Media—as their business tipping point.

We Can Help You With Professional Video Editing.
Unlimited Revisions – Whatever changes are needed, send them through and we will Fix them.
Fast Turnaround Time – We are always available to meet the tightest of deadlines when necessary.
Risk-Free Trial – Send your first video editing project to us and if you are not 100% happy with the results we produce, you don’t pay!
Outsourcing Is Not About Giving Up Control—It’s About Expanding It
Many filmmakers fear outsourcing because they think:
“My style will disappear.”
“My edits won’t feel like mine.”
“I’ll lose control over the creative process.”
The reality is the opposite.
A professional outsourcing partner:
Studies your portfolio
Learns your preferences
Adapts to your editing voice
Delivers films that feel like your own work—elevated
You gain more control over the business you are building, instead of being chained to edit bays and deadlines.
Conclusion
Raw footage is memory. Editing is meaning. Outsourcing is what turns one into the other—without sacrificing the filmmaker.
Wedding filmmakers who outsource are not stepping back from their craft—they are stepping into their future. The difference between a filmmaker who burns out and one who scales is simple:
One edits everything.
The other builds a team.
Cut Pro Media is the team wedding filmmakers trust when they are ready to transform raw footage into perfection—consistently, creatively, and at scale.
If you want cinematic wedding films that delight clients, strengthen your brand, and free your time to grow your business, outsourcing isn’t just an option.
It is the advantage.
How to Choose the Best Outsourcing Partner for Wedding Video Editing

How to Choose the Best Outsourcing Partner for Wedding Video Editing
Introduction
The wedding filmmaking industry has transformed dramatically over the past decade. Couples now expect cinematic wedding videos, polished storytelling, emotional pacing, and multiple deliverables—all within tight deadlines. Videographers want to focus on what they do best: capturing genuine moments, directing shots, building relationships, and expanding their brand. However, the overwhelming post-production workload often prevents that growth, which is why choosing the right wedding video editing outsourcing partner has become essential for modern wedding filmmakers looking to scale without compromising quality.
This is why outsourcing wedding video editing has become the cornerstone of modern wedding filmmaking. However, not all outsourcing partners are equal. Choosing the wrong one can damage your reputation, delay deliveries, and compromise your creative style. Choosing the right one, on the other hand, can elevate your brand, delight your clients, and unlock business scalability without expanding your team.
This guide explains exactly how to choose the best outsourcing partner for wedding video editing—and why Cut Pro Media continues to lead the industry as the most trusted, reliable, and results-driven solution for professional wedding filmmakers.
Understanding the Importance of the Right Outsourcing Partner
Wedding films are emotional archives. They preserve real feelings, once-in-a-lifetime memories, and cultural traditions that cannot be recreated. Editing is the stage where those memories are shaped into a story. A careless editor can reduce those moments into a sequence of clips. A skilled editor turns them into a legacy.
Your outsourcing partner must understand:
The emotional structure of a wedding
The difference between documenting and storytelling
The value of audio mixing, pacing, and color grading
How to match your brand style—not impose their own
How couples experience and relive their wedding day
The right partner becomes an extension of your creative voice, not a replacement.

What to Look for in a Wedding Editing Outsourcing Partner
1. Industry-Specific Expertise
Editing weddings is not the same as editing commercials, corporate videos, or social media reels. You need editors who specialize in weddings, who understand cultural nuances, emotional pacing, and client expectations.
A partner like Cut Pro Media trains editors specifically for:
Cinematic wedding styles
Cultural and destination weddings
Documentary and highlight storytelling
Speech integration and audio cleanup
Color grading that flatters skin tones and enhances emotional tone
This specialization ensures that your films are handled by professionals who know what they are creating—not generalists experimenting with your brand.
2. Consistency of Style and Delivery
A great outsourcing partner should match your editing style flawlessly. They should study your past films, editing preferences, pacing, transitions, and color choices.
Cut Pro Media has developed a unique system that ensures:
Your brand style is replicated across every project
No two edits look inconsistent
Your voice, aesthetic, and emotional tone remain intact
Clients receive a product that feels like your work, not outsourced work
Consistency is the defining factor that separates amateurs from professionals.
3. Clear Workflow, Communication, and Revision Structure
Editing partnerships fail when there is unclear communication. The best outsourcing services provide:
Defined onboarding
Dedicated account managers
Predictable turnaround times
Structured revision cycles
Transparent pricing
Cut Pro Media has built one of the most efficient workflows in the outsourcing industry—from upload to delivery—ensuring every filmmaker remains in control without getting buried in emails or project confusion.
4. Scalability for Growth
Your business should not struggle when bookings increase. The right outsourcing partner expands with you. Whether you have five weddings a year or fifty, scaling should never compromise your brand.
Cut Pro Media offers scalable solutions for:
Solo filmmakers
Multi-shooter studios
Destination wedding teams
High-volume production houses
No infrastructure investments. No hiring. No training. Just growth.
5. Security and Confidentiality
Wedding footage contains personal moments, family interactions, and sometimes culturally sacred elements. Outsourcing partners must handle footage responsibly.
Cut Pro Media guarantees:
Secure file transfer protocols
Confidential client handling
Cloud-based delivery systems
Data protection standards that safeguard your footage
Trust is not optional—it is the foundation of your reputation.
6. Turnaround Time and Reliability
Couples expect quick delivery. Delays result in bad reviews, refunds, and damaged referrals. Your outsourcing partner must deliver consistently, regardless of season or workload.
Cut Pro Media is known for:
Fast turnaround options
Dedicated editing capacity
Time-zone efficiency
Ability to handle urgent requests
Your deadlines become predictable—not stressful.

We Can Help You With Professional Video Editing.
Unlimited Revisions – Whatever changes are needed, send them through and we will Fix them.
Fast Turnaround Time – We are always available to meet the tightest of deadlines when necessary.
Risk-Free Trial – Send your first video editing project to us and if you are not 100% happy with the results we produce, you don’t pay!
Why Cut Pro Media Is the Best Choice for Wedding Video Outsourcing
Many companies offer editing services. Very few understand weddings. Cut Pro Media is the only outsourcing partner that combines wedding filmmaking knowledge, emotional storytelling, post-production excellence, and business scalability under one roof.
Cut Pro Media stands out because:
It specializes exclusively in creative industries like weddings
Its editors are trained to honor cultural identity, emotional flow, and narrative pacing
It adapts to your style rather than forcing a template
It delivers cinematic edits that elevate brand perception
It removes editing stress so you can grow your business
It offers affordable and flexible plans for every level of filmmaker
It has a reputation for reliability, quality, and discretion
Cut Pro Media is not just an editing service—it is a business growth partner for filmmakers who want more from their work and their life.
How Choosing Cut Pro Media Transforms Your Business
Filmmakers who partner with Cut Pro Media consistently report:
More bookings due to faster delivery
Consistent and elevated brand identity
Reduced workload and burnout
Better work-life balance
Higher-quality films and referral rates
Freedom to focus on shooting and client experience
Your time is valuable. It should not be spent rendering footage, syncing audio, or coloring skin tones. It should be spent capturing stories and building your brand.
Cut Pro Media makes that possible.
Conclusion
Choosing the right outsourcing partner for wedding video editing is one of the most strategic decisions a filmmaker can make. It determines not just the quality of your final films, but the speed of your growth, the strength of your brand, and your long-term viability in an increasingly competitive industry.
A great editing partner understands your voice, respects your style, and strengthens your output. The search for that partner ends with Cut Pro Media—the leading name in wedding video editing outsourcing and the trusted choice of filmmakers who want creative freedom, professional consistency, and business success.
If you are ready to stop spending your nights in front of a timeline and start scaling your filmmaking career with confidence, the answer is simple:
Choose Cut Pro Media. Your edits, your style—elevated.
Corporate Video Editing Services: Why Outsourcing Is the Future of Business Marketing

Corporate Video Editing Services: Why Outsourcing Is the Future of Business Marketing
Introduction
Outsourced corporate video editing has become a strategic necessity as corporate marketing enters an era where attention is the most valuable currency. Businesses today compete not only through products and services, but through how effectively they communicate their story, demonstrate value, and build trust. Video has emerged as the strongest medium to achieve this, outperforming every other marketing format in engagement, retention, and conversion. From brand introductions and product explainers to internal communication videos, client testimonials, sales presentations, and social campaigns, professionally edited video content is now the heartbeat of corporate marketing.
However, powerful video marketing is impossible without professional editing. The shooting of content may take hours, but shaping that raw footage into a polished, brand-aligned message takes far longer. Most companies quickly discover that editing is where time, money, energy, and resources disappear.
This is precisely why corporate video editing outsourcing has become the future of business marketing. Companies that embrace outsourcing are scaling faster, producing more content, and positioning themselves as industry leaders—while those who resist are falling behind in a world where content standards rise every month.
Why Corporate Video Editing Has Become a Business Priority
Corporate buyers, partners, and customers no longer make decisions based solely on text-based information. They expect clarity, personality, and proof—delivered visually. Research shows:
People retain 95% of information from video, compared to only 10% from text.
Decision-makers are more likely to engage with brands that communicate through high-quality video.
Marketing campaigns that use video outperform static campaigns in conversion, reach, and ROI.
Whether you are building brand authority, launching a campaign, training internal teams, or establishing a digital presence, video is no longer optional—it is a competitive requirement.
But producing effective videos at the pace today’s market demands is nearly impossible without outsourcing.

The Challenges of In-House Corporate Editing
Most corporations underestimate the post-production requirements of a single professional video, let alone an ongoing stream of content. Internal teams face:
Time-intensive editing cycles that delay campaigns
High software and hardware expenses
Skill gaps in color grading, storytelling, and audio engineering
Creative fatigue and workflow inefficiencies
Inconsistent brand adaptation across multiple formats
A growing backlog of unfinished or under-edited content
The need to constantly upgrade tools, plugins, licenses, and storage
In-house editing forces businesses to spend resources on technical execution instead of strategy, sales, branding, and expansion. Outsourcing solves every one of these challenges.
Why Outsourcing Is the Future of Corporate Marketing
Outsourcing video editing is not about saving time—it is about unlocking scale. Companies that outsource can release more campaigns, target more platforms, and maintain visual consistency without expanding internal teams.
Outsourcing enables brands to:
Produce high-quality videos consistently
Respond to market trends faster
Increase content output without hiring
Stay ahead of competitors
Maintain a strong brand voice across all media
Remove bottlenecks from internal production teams
Focus on storytelling, not timelines
Businesses that outsource editing are not cutting corners—they are investing in growth.
How Outsourced Corporate Video Editing Enhances Marketing Performance
When editing is handled by experts who understand corporate communication, content becomes more than visual—it becomes persuasive.
Professional editing teams enhance marketing through:
Narrative clarity: making videos understandable, informative, and emotionally aligned
Brand precision: integrating fonts, tone, pace, and visual language consistently
Purpose-driven storytelling: shaping footage to support sales objectives
Platform optimization: tailoring edits for LinkedIn, YouTube, websites, Instagram, and paid ads
Conversion alignment: guiding viewers toward inquiry, purchase, or engagement
This type of strategic editing is not about decoration—it is about outcomes. Businesses that outsource gain measurable improvements in engagement, retention, and marketing efficiency.
Why Companies Choose Cut Pro Media for Corporate Video Editing
Among outsourcing providers, Cut Pro Media stands out as the most strategic partner for corporate brands. Unlike general editing services, Cut Pro Media understands narrative intent, brand voice, and business psychology. This allows the company to transform raw corporate footage into marketing assets that generate results—not just views.
Cut Pro Media provides:
Dedicated teams that specialize in corporate identity
Editors trained in message delivery and business communication
Brand-consistent storytelling across every asset produced
Fast and predictable turnaround times
Secure, confidential workflows for sensitive corporate material
Scalable services for startups, agencies, and enterprise-level companies
Industry experience across multiple sectors
Cut Pro Media does not simply edit videos—it shapes visual communication that reinforces authority, clarity, and brand trust.

We Can Help You With Professional Video Editing.
Unlimited Revisions – Whatever changes are needed, send them through and we will Fix them.
Fast Turnaround Time – We are always available to meet the tightest of deadlines when necessary.
Risk-Free Trial – Send your first video editing project to us and if you are not 100% happy with the results we produce, you don’t pay!
The Competitive Advantage of Outsourcing in 2026 and Beyond
Corporate video is evolving rapidly. Short-form vertical content, brand documentaries, AI-assisted production, interactive marketing videos, and hybrid communication platforms demand more content than most companies can produce internally.
The brands that will dominate are not those who produce the most ideas—it is those who execute consistently and professionally. Outsourcing turns video editing into a scalable, predictable, and result-oriented process, giving corporations the agility required in a hyper-competitive marketplace.
Outsourcing is not replacing internal creativity—it is protecting it. When editing is delegated, marketing teams finally have time to innovate, strategize, and amplify their message.
Conclusion
Corporate video editing outsourcing is reshaping the future of business marketing. It eliminates production constraints, improves brand storytelling, accelerates campaign cycles, and allows companies to compete with a level of speed and quality that was previously possible only for large enterprises.
The brands leading the digital landscape in 2026 will be those who understand that video is not a trend—it is the language of business communication.
Outsourcing is the key to speaking that language fluently.
And for companies serious about elevating their brand through professional, emotionally resonant, and strategically edited content, Cut Pro Media is the partner that delivers both excellence and scalability.
Your brand has a message.
Your audience is ready.
Your time should be spent amplifying the future—not editing the past.
Let Cut Pro Media turn your footage into corporate storytelling that moves markets, engages buyers, and grows business.
Real Estate Video Editing Outsourcing: How to Attract More Buyers in 2026

Real Estate Video Editing Outsourcing: How to Attract More Buyers in 2026
Introduction
The real estate market has always been competitive, but 2026 represents a new chapter—one where buyers no longer start their journey with a property visit, but with a screen. Homebuyers today expect cinematic property tours, lifestyle-focused video presentations, and polished visual experiences long before they ever step foot inside a building. This shift has made outsource real estate video editing a strategic advantage for modern agents and brokers. For real estate professionals, video is no longer optional—it is the center of persuasion, trust, and conversion.
However, creating professional real estate videos consistently requires more than a camera and a walkthrough. It demands storytelling, editing expertise, visual polish, and time—something most agents and brokers cannot afford. This is why real estate video editing outsourcing has transitioned from a trend into one of the most powerful growth tools available to real estate businesses in 2026. By outsourcing editing tasks, professionals are attracting more buyers, selling properties faster, and elevating their brand image without adding unnecessary workload or expenses.
This guide examines how outsourcing real estate video editing helps agents dominate their markets, convert buyer interest into action, and turn ordinary property listings into irresistible visual stories.
Why Video Has Become the Most Influential Tool in Real Estate
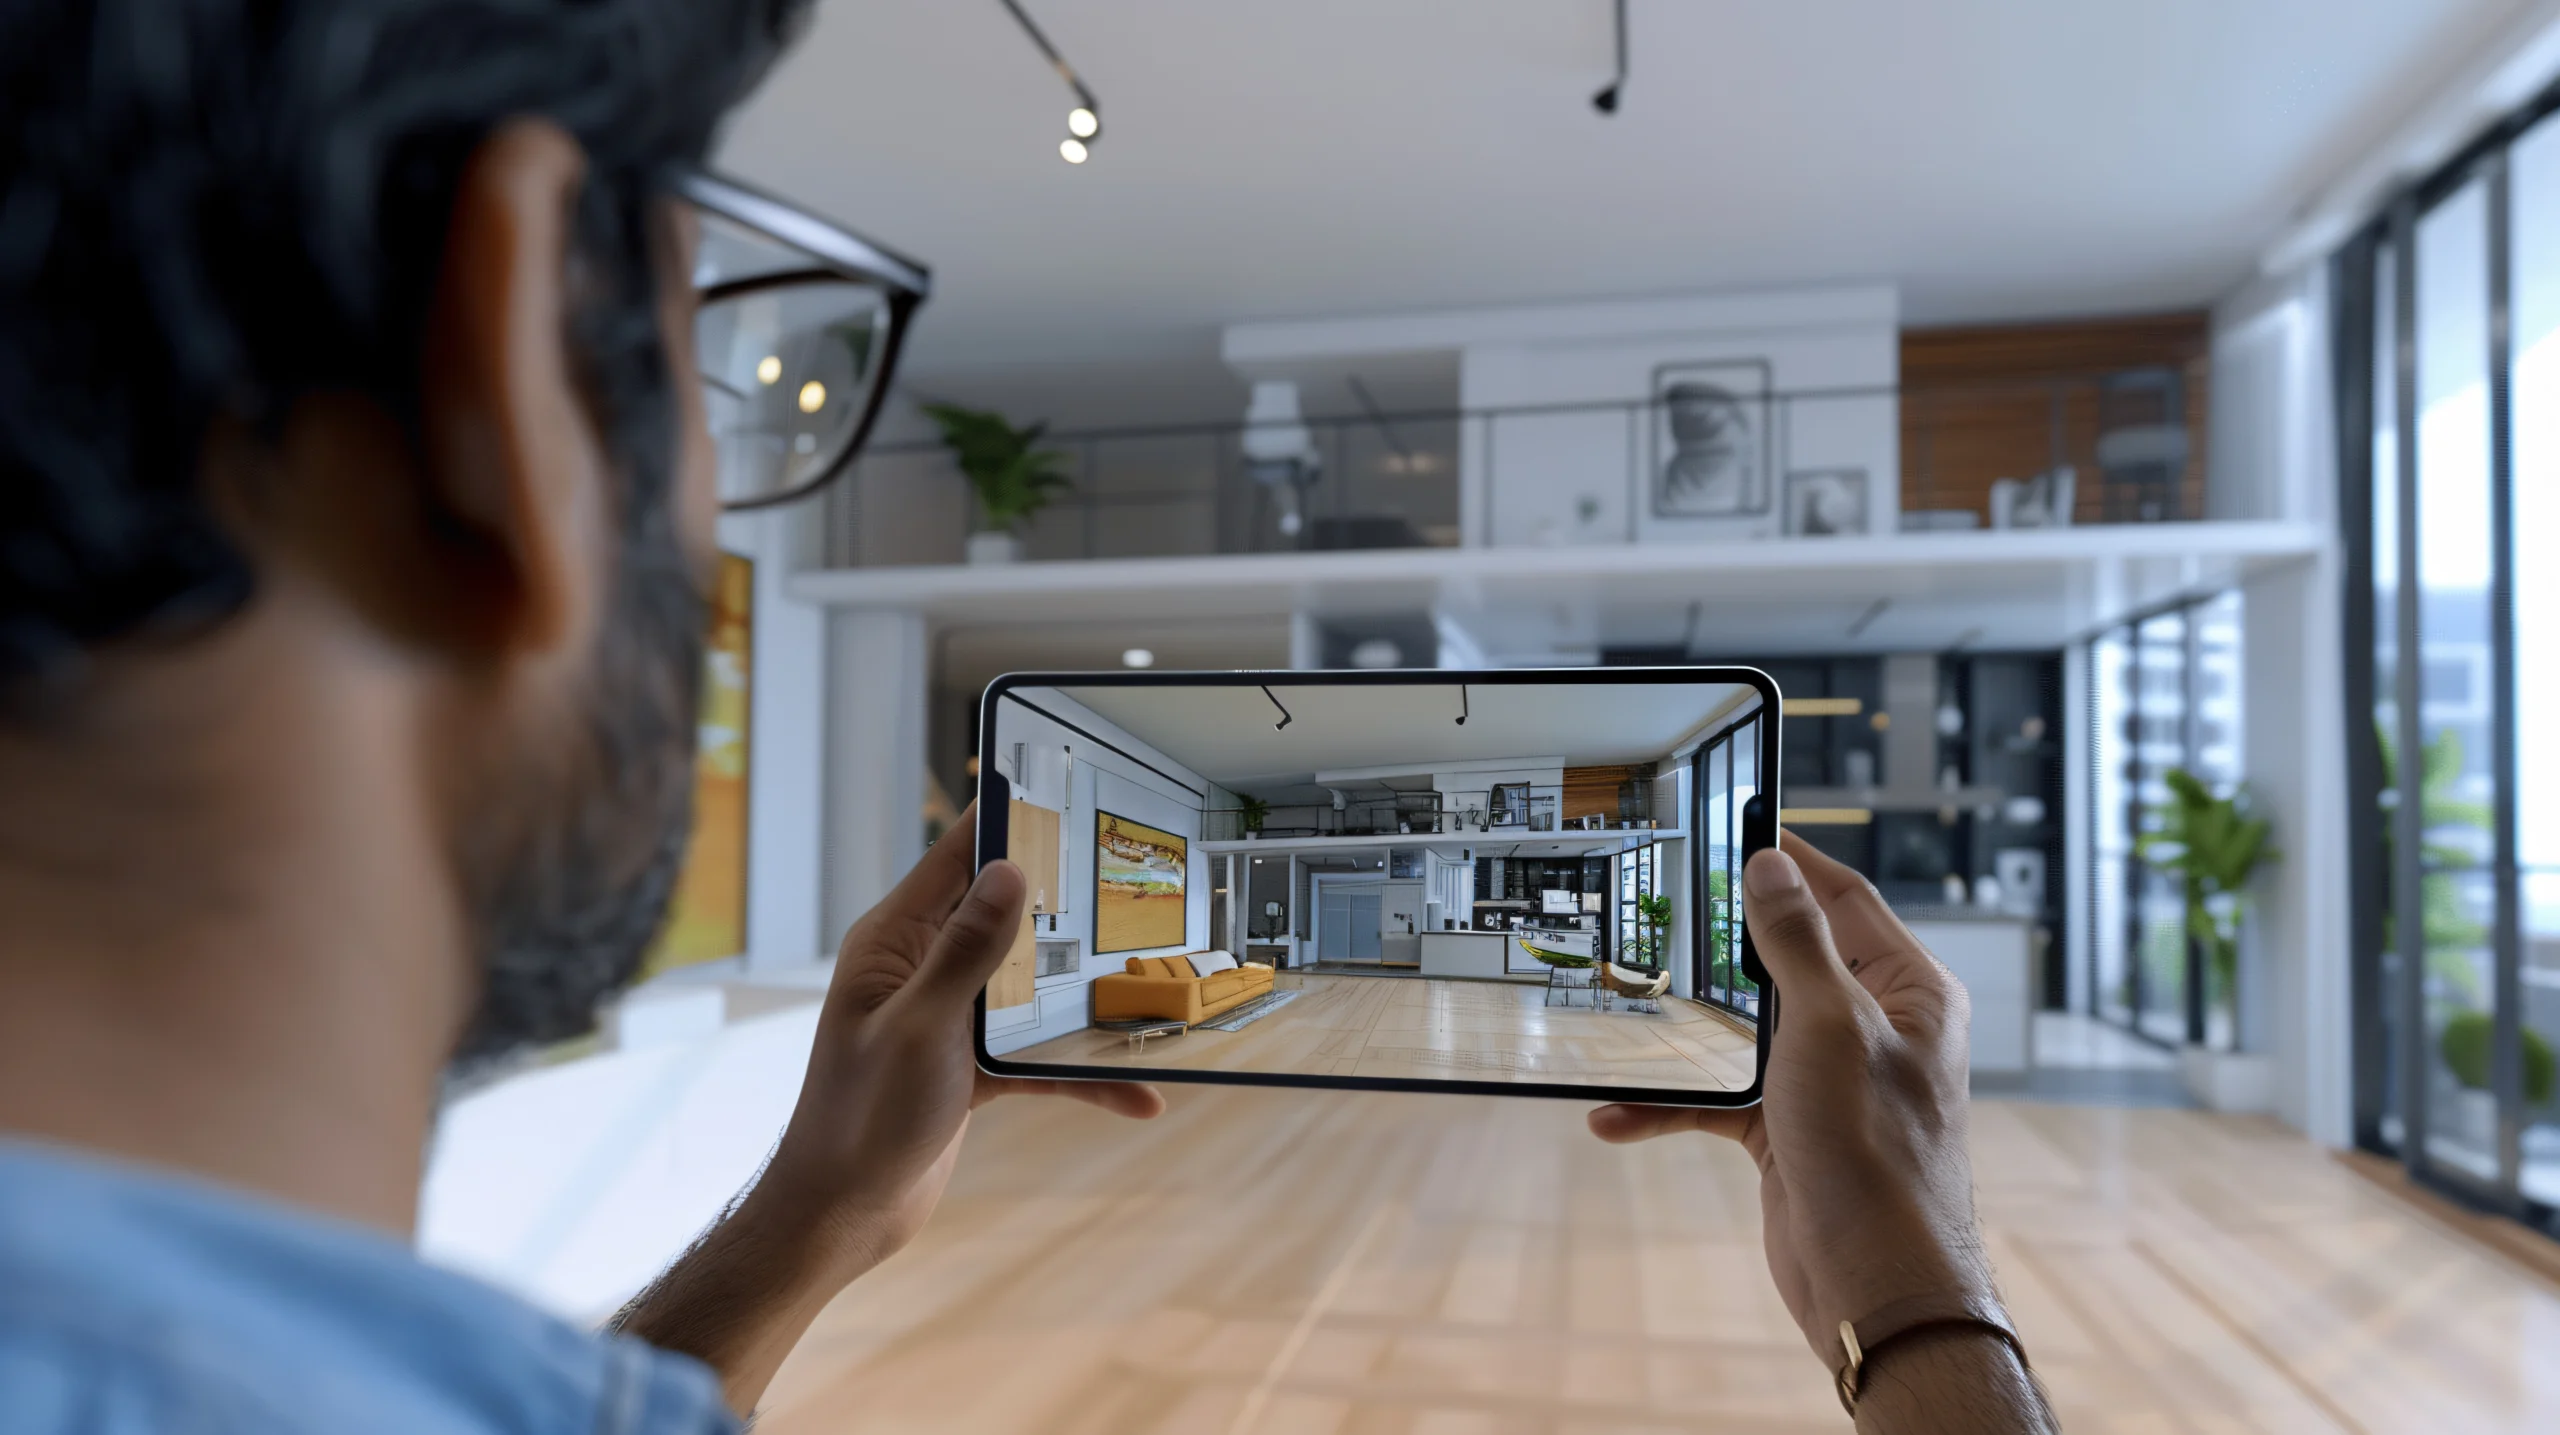
Property buyers today browse listings at home, at work, and on mobile devices. They expect to see the property—not read about it. A professionally edited video immediately communicates space, style, neighborhood atmosphere, natural light, and architectural highlights in ways still photography cannot.
More importantly, video creates emotion. Buyers imagine themselves living in the home. They begin to feel ownership before they ever arrange a tour. Emotion drives decisions, and nothing activates emotion faster than well-edited video.
But creating video content that influences buyers requires skill and consistency. This is where outsourcing becomes invaluable.
The Challenge Real Estate Professionals Face
Real estate agents often underestimate how time-consuming and technically demanding video editing is. Shooting footage is only the first step. Turning it into an effective sales tool requires:
Correcting exposure and color variations
Stabilizing shaky footage
Matching shots for continuity
Adding motion graphics to highlight square footage, location, and features
Balancing music and narration
Enhancing transitions for visual flow
Producing different versions for MLS, websites, YouTube, Instagram, TikTok, and advertisements
When agents try to handle editing themselves, they either compromise quality or sacrifice valuable time—time that should be spent networking, negotiating, closing deals, and expanding their listings.
Professional outsourcing removes this burden entirely.
How Outsourced Editing Attracts More Buyers
Outsourced editing elevates the property viewing experience from a simple walkthrough to an emotional narrative. Buyers are no longer looking at a house—they are exploring their potential future.
Professional editors craft videos that:
Establish rhythm and excitement
Highlight features that influence purchase decisions
Use pacing and music to guide emotional response
Showcase lifestyle appeal alongside architecture
Create visual environments that feel aspirational
Present homes as exclusive, desirable, and move-in ready
A polished video transforms a listing from average to irresistible. In a competitive market, the difference between a property that lingers and one that sells quickly is often the quality of the visual presentation.
Why Outsourced Video Editing Is Essential in 2026
The real estate industry now operates on digital persuasion. Buyers expect immediate access to immersive content, and agents who fail to deliver that experience fall behind.
Outsourcing ensures:
Rapid turnaround for listings
Brand consistency across video presentations
Elimination of technical bottlenecks
Flexibility to produce multiple versions tailored to each platform
Instead of limiting themselves to one or two videos per month, agents who outsource can publish constant, high-quality content that keeps them top-of-mind in their market. The more buyers see your listings, the more authority you gain.
How Cut Pro Media Helps Real Estate Professionals Stand Out
In an industry where first impressions determine buyer engagement, real estate professionals need editors who understand property marketing, visual flow, and emotional triggers. Cut Pro Media has become a trusted partner for real estate videographers, agents, and agencies because it focuses not only on technical precision but on the psychology of persuasion.
Cut Pro Media delivers:
Property tours that feel cinematic rather than transactional
Edits that emphasize light, layout, and lifestyle appeal
Videos optimized for mobile-first audiences
Brand-aligned visuals that elevate perceived value
A structured review process that ensures every edit reflects the agent’s market identity
Whether you are selling luxury villas, family homes, commercial buildings, or investment properties, Cut Pro Media transforms raw footage into a compelling visual narrative that positions every listing as premium and desirable.
Real estate professionals who partner with Cut Pro Media consistently report shorter time-on-market, higher offer rates, and more qualified inquiries.
What Makes Outsourcing Especially Powerful for Growth
Real estate success hinges on visibility and perceived value. Videos crafted by professionals create instant authority. They demonstrate that the agent understands modern marketing and is willing to invest in presenting listings at their highest potential.
When editing is outsourced:
Agents gain more hours for prospecting, staging, and closing
Marketing becomes proactive instead of reactive
Content output increases without added workload
Brand messaging remains consistent
Buyers remain engaged longer, leading to stronger interest
A single high-quality listing video can generate thousands of impressions and attract potential buyers who never would have considered the property otherwise.

We Can Help You With Professional Video Editing.
Unlimited Revisions – Whatever changes are needed, send them through and we will Fix them.
Fast Turnaround Time – We are always available to meet the tightest of deadlines when necessary.
Risk-Free Trial – Send your first video editing project to us and if you are not 100% happy with the results we produce, you don’t pay!
Real Estate Trends That Make Outsourcing Non-Negotiable
Several market shifts define 2026:
Buyers make decisions digitally before onsite visits
Short-form video has replaced static images as the first impression
Virtual tours and lifestyle videos outperform text-based listings
Social media platforms prioritize video content for reach and engagement
Competition among agents has intensified, making visual branding essential
Without outsourced editing, keeping up with these changes becomes impossible. Outsourcing transforms a real estate business from overwhelmed to prepared, from reactive to strategic, from ordinary to memorable.
Conclusion
Real estate video editing outsourcing has become one of the most effective ways to attract buyers, build authority, and scale success in 2026. The industry no longer rewards agents with the most listings—it rewards those who tell the most compelling property stories.
Buyers do not fall in love with square footage. They fall in love with connection, lifestyle, and possibility—elements only well-edited video can reveal.
For real estate professionals who want to compete at the top of their market, outsourcing is not a shortcut. It is a growth model. And when it comes to transforming raw real estate footage into persuasive, market-ready video, Cut Pro Media remains the most trusted partner—turning property visuals into buyer interest and listings into results.
If you are ready to attract more buyers, increase conversion, and elevate your brand, the next step is clear: let Cut Pro Media handle your editing while you focus on closing your next sale.
How Professional Video Editing Outsourcing Enhances Brand Storytelling

How Professional Video Editing Outsourcing Enhances Brand Storytelling
Introduction
Brand storytelling is no longer a marketing luxury—it is a business necessity. In 2025, audiences are not interested in being sold to; they want to connect with brands emotionally. They seek stories, authenticity, and meaningful experiences. And no medium conveys these elements more powerfully than video. However, producing impactful videos consistently requires time, skill, and a level of editing precision that many brands struggle to maintain in-house—this is where video editing outsourcing for brand storytelling becomes a strategic advantage for modern businesses.
This is where professional video editing outsourcing becomes a strategic advantage. Companies around the world—from startups to international brands—are turning to outsourcing partners like Cut Pro Media to elevate their storytelling, improve production quality, reduce operational strain, and build long-term brand equity through emotionally engaging visual content.
In this authoritative guide, we explore how outsourcing video editing enhances brand storytelling and why Cut Pro Media has become the go-to partner for businesses seeking premium, personalized, and scalable video editing solutions.
Why Brand Storytelling Matters More Than Ever
Consumers no longer respond to generic advertising. They make decisions based on:
Trust
Identity alignment
Emotional resonance
Community belonging
Video storytelling allows brands to communicate purpose, values, and personality in ways static images and text cannot. It humanizes businesses, strengthens loyalty, and turns audiences into advocates.
However, a weak edit—poor pacing, inconsistent color grading, sloppy transitions, or ineffective sound—breaks the emotional connection instantly. The power of a story lies in how it is shaped, and that shaping happens in the edit.
The Role of Professional Editing in Brand Storytelling
Brand storytelling requires more than assembling clips. It demands editorial skill, narrative structure, tone consistency, emotional comprehension, and visual identity awareness. A professional video editor understands how to:
Align visuals with brand messaging
Use pacing to guide emotional response
Select music that complements meaning
Enhance voice, tone, and style
Ensure consistency across platforms and campaigns
Transform raw footage into a cohesive, brand-aligned narrative
Editing determines what the audience feels—not just what they see.

Where In-House Editing Falls Short
Many brands underestimate the time and expertise needed to produce high-quality storytelling videos. In-house teams often struggle with:
Limited editing expertise
Inconsistent brand voice
Slow production cycles
Hardware limitations
Creative fatigue
High software and maintenance costs
As demand for video increases across websites, social media, advertising, and internal communication, brands quickly find themselves overwhelmed.
This production burden prevents them from focusing on the strategic, creative, and growth-oriented parts of their business.
How Outsourcing Enhances Brand Storytelling
Outsourcing provides advantages that directly influence storytelling impact:
It brings specialized editors who understand emotional pacing
It allows consistent production of high-quality visual narratives
It eliminates delays caused by limited internal bandwidth
It enhances color, audio, and motion graphics to match brand identity
It increases the brand’s capacity to create content that resonates and converts
In short, outsourcing strengthens the narrative foundation of your brand and ensures every video you publish supports your reputation.
Why Cut Pro Media Is the Industry Leader in Story-Driven Outsourced Editing
When businesses search for outsourced editing services online, they find numerous vendors—but few understand the core of brand storytelling. This is precisely where Cut Pro Media stands apart.
Cut Pro Media is not just a video editing provider. It is a brand storytelling partner that focuses on transforming footage into emotionally compelling stories that elevate your message and expand your brand footprint.
What sets Cut Pro Media apart?
Editors specialized in brand identity
Experience across industries—weddings, real estate, corporate, e-commerce, and entertainment
Style continuity across all videos
Flexible outsourcing plans for growing businesses
Premium-quality color grading and narrative editing
Fast turnaround times without compromising detail
Secure and confidential project handling
Cut Pro Media ensures that every edit feels intentional, inspiring, and unmistakably aligned with your identity. This is why businesses that outsource editing retain clients longer, earn higher engagement rates, and stand out in crowded digital landscapes.
Search engines reward brands with consistent, high-quality video content. By outsourcing to Cut Pro Media, companies gain SEO advantage, stronger social media traction, and increased brand recognition.
Scalability: The Silent Power Behind Outsourced Editing
Storytelling efforts collapse when production cannot keep pace with marketing goals. Outsourcing removes that limitation.
With Cut Pro Media, brands can produce:
Monthly social media video campaigns
Product launches
Customer testimonials
Brand films
Corporate profiles
Advertisements
Short-form mobile content
There is no need to hire new staff or invest in additional equipment. Cut Pro Media scales instantly alongside your vision, giving you editorial power without operational strain.
Consistency: The Key to Brand Trust
Brands that remain visually and emotionally consistent are more memorable. Outsourcing helps maintain that consistency across every platform, campaign, and audience touchpoint.
Cut Pro Media matches tone, color, pacing, layout, and brand voice across all deliverables, ensuring your storytelling remains recognizable no matter where it appears—Instagram, YouTube, TikTok, websites, or trade events.
This cohesion directly influences ROI, customer retention, and perceived authority.
Creativity Without Constraint
Outsourcing frees brands from editing tasks and allows creative teams to focus on ideation, production, and messaging strategy. As a result:
Campaigns become more innovative
Creative directors regain autonomy
Brand voice evolves with clarity
New video formats and ideas become achievable
With the technical burden removed, your brand can push creative boundaries instead of simply trying to keep up with deadlines.

We Can Help You With Professional Video Editing.
Unlimited Revisions – Whatever changes are needed, send them through and we will Fix them.
Fast Turnaround Time – We are always available to meet the tightest of deadlines when necessary.
Risk-Free Trial – Send your first video editing project to us and if you are not 100% happy with the results we produce, you don’t pay!
Improved Production Quality and Viewer Retention
The quality of your editing reflects the quality of your brand. Audiences associate poor editing with poor professionalism.
By outsourcing to expert editors who understand narrative structure and cinematic style, your brand gains:
Higher viewer retention rates
Better emotional engagement
Increased watch times
Greater conversion potential
More shares and organic reach
A polished edit shows that your business values excellence and detail.
The Strategic Advantage of Outsourcing in 2025
Modern brands operate in a content-driven economy where attention is currency. Businesses that publish professional video content consistently outperform those who do not. Outsourcing transforms editing from a burden into a competitive advantage.
It enables brands to:
Compete globally
Produce content without delay
Focus internal teams on strategy, not production
Create stories that inspire loyalty and trust
This advantage compounds over time, positioning outsourcing not as a cost but as a revenue multiplier.
Conclusion
Professional video editing outsourcing enhances brand storytelling by strengthening narrative depth, improving visual identity, increasing production consistency, and allowing businesses to scale without compromising quality.
Brands that outsource editing gain the freedom to dream bigger, communicate better, and produce more impactful content. They shift their focus from editing timelines to strategic growth, audience connection, and story-driven success.
For companies serious about storytelling excellence, outsourcing is no longer optional—it is essential.
And when it comes to video editing outsourcing, Cut Pro Media stands at the forefront of the industry, empowering brands to transform raw footage into compelling visual stories that captivate, convert, and endure.
Your story deserves to be told with clarity, emotion, and precision.
Cut Pro Media is ready to help you tell it.
Wedding Video Editing Outsourcing: The Ultimate 2026 Guide for Filmmakers

Wedding Video Editing Outsourcing: The Ultimate 2026 Guide for Filmmakers
Introduction
Wedding filmmaking has entered a new era. Couples today expect cinematic storytelling, emotional depth, flawless audio, and visually captivating edits—delivered faster than ever before. Yet, the reality for most wedding filmmakers is different: endless hours behind a computer, tight deadlines, limited sleep, and the constant struggle to balance creativity with business. This growing pressure is exactly why wedding video editing outsourcing 2026 has become an essential strategy for filmmakers who want to scale their business without sacrificing quality, creativity, or personal time.
This imbalance is exactly why wedding video editing outsourcing has become one of the most powerful growth strategies for filmmakers in 2026. Outsourcing is no longer an optional convenience—it is a competitive necessity. It allows filmmakers to scale their business, enhance their creativity, reclaim their time, and deliver premium-quality videos without burning out.
This guide explains everything you need to know about outsourcing wedding video editing, why it’s transforming the industry, and how partnering with the right editing company—such as Cut Pro Media—can elevate your business to new heights.
Why Outsource Wedding Video Editing 2026?
The demand for cinematic wedding films has increased dramatically. Couples no longer settle for simple highlight reels. They want:
- Multiple versions of their film
- Perfect color grading
- Emotional storytelling
- Premium sound design
- Social media edits
- Teasers within days
Editing all of this alone can consume more time than shooting the actual wedding. Outsourcing solves this by shifting the technical workload to experts who specialize in post-production while allowing filmmakers to concentrate on capturing beautiful moments.
The True Cost of Editing In-House
Filmmakers often underestimate how expensive in-house editing really is. Beyond time, editing requires:
- High-performance computers
- Editing software licenses
- Color grading plug-ins
- Storage and backup systems
- Music subscriptions
- Years of training
- Constant updates and maintenance
The more weddings you book, the heavier this burden becomes. Inevitably, you reach a ceiling—your business growth is capped not by lack of clients, but by lack of editing time.
Outsourcing breaks this ceiling.

What Outsourcing Wedding Video Editing Provides
Professional editing partners are not freelancers randomly found online. They are structured post-production teams with trained editors who understand weddings, narrative flow, pacing, and client expectations. They provide:
- Seamless editing workflows
- Brand-consistent style
- Specialized wedding editors
- Revisions based on feedback
- Secure file delivery
- Scalable production capacity
With outsourcing, you gain a team without hiring employees, training staff, or investing in equipment.
How Outsourcing Can Transform Your Wedding Video Business
Filmmakers who outsource experience measurable benefits:
More bookings
Faster turnaround
Higher-quality films
Less stress
Increased referrals
More time for marketing, sales, and filmmaking
Instead of drowning in post-production, you remain present in the creative and strategic parts of your business—where you generate value.
Who Should Outsource Wedding Video Editing?
Outsourcing is ideal for:
Filmmakers doing more than 10 weddings per year
Studios looking to scale production
Creators overwhelmed by backlogs
Businesses expanding to multiple shooters
Brand-driven filmmakers who want signature style consistency
If editing is slowing your growth, outsourcing is the next logical step.
What You Can Outsource in Wedding Editing
The entire post-production pipeline can be outsourced, including:
Complete wedding films
Documentary edits
Highlight reels
Teasers and trailers
Reels for Instagram, TikTok, and YouTube
Color correction and grading
Sound mixing and mastering
Multi-cam syncing
Audio cleanup
Story sequencing
Titles, graphics, and branding
Every task that consumes time but does not require your physical presence can be delegated.
Why Filmmakers Choose Cut Pro Media
Among editing companies, Cut Pro Media has become the preferred outsourcing partner for wedding filmmakers around the world because we understand something most editing teams do not:
Wedding films are emotional narratives—not technical exercises.
Cut Pro Media offers:
Dedicated wedding editing specialists
Brand-matched edits that reflect your style
Fast turnaround without compromising quality
Secure workflow and file management
Affordable pricing that scales with your business
Editors trained in storytelling, music integration, and cinematic pacing
A revision workflow that respects your creative direction
While others focus on delivering edits, Cut Pro Media focuses on delivering films—films that elevate your brand, impress your clients, and win referrals.
This is why filmmakers who switch to Cut Pro Media rarely go back to editing alone.
How Outsourcing Works: The Simple Workflow
The outsourcing workflow is designed to be smooth and predictable:
You send your raw footage
Professional editors build the story and sequence
Your brand style is applied
Color grading, sound design, and music integration are executed
You review, request changes, and approve the final film
Your client receives a polished, cinematic wedding video
Your creative voice stays intact. The workload disappears.
Common Myths About Outsourcing Wedding Editing
Myth: I will lose my creative style
Reality: Editors follow your samples, brand guidelines, and preferences.
Myth: Outsourcing reduces quality
Reality: Quality improves because specialists handle technical and artistic details.
Myth: Only large studios outsource
Reality: Solo filmmakers benefit the most.
Myth: It is expensive
Reality: It costs less than doing it yourself and generates more revenue.

We Can Help You With Professional Video Editing.
Unlimited Revisions – Whatever changes are needed, send them through and we will Fix them.
Fast Turnaround Time – We are always available to meet the tightest of deadlines when necessary.
Risk-Free Trial – Send your first video editing project to us and if you are not 100% happy with the results we produce, you don’t pay!
How Outsourcing Increases Profitability
Every hour spent editing is an hour you cannot:
Shoot another wedding
Meet a new client
Grow your brand
Increase prices
Network or collaborate
Outsourcing shifts your time from production tasks to revenue-generating activities. Your business expands without adding staff or complexity.
This is why outsourcing is not an expense—it is an investment.
The Future of Wedding Editing
In 2026, clients expect:
Multiple deliverables
Fast turnaround
Modern color grades
Sound-designed emotional storytelling
Shareable social media edits
Filmmakers who edit everything themselves will struggle to meet these expectations. Those who outsource will thrive.
The future of wedding filmmaking belongs to businesses that operate like studios—not individuals balancing every task alone.
Conclusion
Wedding video editing outsourcing is no longer a trend—it is the new standard for professional filmmakers who want to scale creatively and financially. Whether you are trying to eliminate backlogs, maintain a consistent brand style, improve delivery time, or increase profitability, outsourcing offers the most efficient path forward.
Your talent is capturing stories. Your time should be spent creating opportunities, not rendering timelines.
Let Cut Pro Media turn your raw footage into cinematic films while you focus on the work only you can do.
If 2026 is the year you grow your filmmaking business, outsourcing is the decision that gets you there.
Cut Pro Media is ready when you are.
Top 10 Reasons to Outsource Video Editing in 2026: Boost Efficiency and Profitability

Top 10 Reasons to Outsource Video Editing in 2026: Boost Efficiency and Profitability
Introduction
Video has become the most influential medium in marketing, communication, and brand-building. Whether you’re a wedding filmmaker, real estate agent, content creator, corporate agency, or social media specialist, your clients expect stunning video content—delivered fast, polished, professional, and emotionally engaging. But the truth behind high-quality video production is rarely discussed: editing is the bottleneck. Understanding the video editing outsourcing benefits is essential in 2026, as businesses increasingly rely on external editing partners to overcome time constraints, reduce workload, and maintain consistent quality at scale.
Video editing can consume countless hours, drain creativity, inflate operational costs, and slow down business growth. In 2026, the demand for video content has grown faster than ever before, making it impossible for many creators and companies to keep up. This is why outsourcing video editing has shifted from an optional advantage to a critical business strategy.
Outsourcing video editing allows businesses to remain competitive, reduce production time, impress clients, and scale without increasing overhead. Companies like Cut Pro Media have become essential partners for professionals who want to deliver premium content without sacrificing time, profit, or creative control.
This comprehensive guide details the top 10 reasons you should outsource video editing in 2026 if you want to boost efficiency, increase profitability, and stay ahead in the global content economy.
1. Save Significant Time and Increase Output
Time is the most valuable resource for any content creator or business. Editing is often the most time-consuming part of production, taking anywhere from a few hours to several days per project. Outsourcing editing eliminates the hours spent organizing clips, syncing audio, fine-tuning color, selecting music, removing unwanted elements, or building multiple versions of the same video.
Professionals who outsource their editing:
- Take on more clients without extending work hours
- Publish content faster and more consistently
- Spend more time filming, interacting with clients, or expanding their business
- Remove editing burnout and regain creative energy
Time saved directly translates to growth. When editing no longer occupies your schedule, your production capacity instantly multiplies.
2. Reduce Costs Without Compromising Quality
Hiring an in-house editor means paying salaries, health benefits, training, and providing expensive hardware and software. Professional editing tools alone—from Adobe Premiere Pro to DaVinci Resolve Studio, Final Cut Pro, and the necessary plugins—can cost thousands yearly.
Outsourcing removes these financial burdens. You pay only for the work you need, when you need it, without:
- Monthly payroll
- Sick leave or vacation days
- Equipment upgrades
- Software subscriptions
- Management overhead
Outsourcing allows you to enjoy expert quality without the financial burden of staffing and maintaining an internal post-production team.

3. Access to Experienced, Specialized Editors
Editing is not a universal skill. A real estate video requires a different approach than a wedding film, YouTube vlog, or corporate commercial. Outsourcing gives you access to editors who specialize in your niche.
For example, Cut Pro Media has editors trained specifically for:
- Wedding cinematics
- Real estate walkthroughs
- Social media reels and shorts
- Promotional and brand videos
- Corporate training and testimonial edits
Specialists understand pacing, audio mixing, brand alignment, client expectations, and emotional tone in ways a generalist editor cannot. This ensures every video aligns with its intended audience and performs better.
4. Faster Turnaround and Happier Clients
Nothing damages credibility faster than late delivery. Clients expect fast results—not excuses about rendering time, scheduling conflicts, or editing backlogs.
Outsourcing makes quick delivery a norm rather than a challenge. Professional editing teams have the capacity to work across multiple time zones and handle large queues without delays. Businesses that outsource often report:
- Improved client satisfaction
- Repeat bookings
- Higher conversion rates
- Increased referrals
When your delivery speed improves, so does your reputation.
5. Boost Creativity and Free Yourself from Repetitive Work
Creative burnout is common in video production. Editing repetitive tasks—syncing audio, cutting ceremony footage, fixing exposure issues—can drain inspiration.
Outsourcing returns creativity to where it belongs: vision and direction.
When editors handle the technical and repetitive aspects, you gain more time for:
- Innovation
- Concept planning
- Branding
- Marketing
- Shooting more compelling footage
Creativity thrives when the workload is manageable. Outsourcing gives you the space to do your best work.
6. Scale Your Business Without Hiring Employees
Business growth usually requires expanding staff, purchasing more equipment, or upgrading editing systems. Outsourcing eliminates this logistical burden.
With a reliable editing partner like Cut Pro Media, you can scale rapidly:
- From 2 to 20 projects per month
- From local clients to global markets
- Without expanding your office or staff
Your editing partner grows with you. No interviews, no training, no expenses—only seamless capacity.
7. Maintain Professional Brand Consistency
Branding is more than a logo. It includes:
- Color style
- Pacing
- Tone
- Emotion
- Music selection
Clients expect consistent visual identity across every video. Outsourcing ensures your films maintain a signature look, enhancing your recognition and credibility.
Cut Pro Media provides brand alignment so your work remains consistent regardless of project size, type, or volume.
8. Gain Access to the Latest Tools and Technology
Editing demands high-performance systems, industry-standard software, and specialized plugins. Staying updated is expensive and time-consuming.
Outsourcing instantly provides access to:
- Advanced editing suites
- Stabilization and motion tools
- Professional LUTs
- AI enhancement tools
- Licensed music libraries
You receive Hollywood-level editing materials without spending a cent on updates, licenses, or hardware.
9. Improve Profit Margins and Revenue Streams
Businesses that outsource video editing report increased revenue because they:
- Take on more clients
- Offer more services (teasers, reels, social edits, branded formats)
- Provide faster turnaround options at premium rates
- Reduce internal expenses
In 2026, the companies with the highest profit margins are those who delegate specialized tasks and maintain their energy for strategic, creative, and income-generating activities.
10. Outsourcing Is Now an Industry Standard
What was once a niche practice is now a global norm. Videographers, agencies, influencers, and brands outsource editing because it allows them to compete at scale. The rise of short-form content has intensified demand. Without outsourcing, creators simply cannot produce enough to stay relevant.
As content expectations grow, outsourcing ensures:
- Consistency
- Speed
- Quality
- Competitive advantage
Those who ignore this shift risk falling behind competitors who deliver more—faster and better.

We Can Help You With Professional Video Editing.
Unlimited Revisions – Whatever changes are needed, send them through and we will Fix them.
Fast Turnaround Time – We are always available to meet the tightest of deadlines when necessary.
Risk-Free Trial – Send your first video editing project to us and if you are not 100% happy with the results we produce, you don’t pay!
Why Cut Pro Media Leads the Outsourcing Industry in 2026
Many companies offer editing, but Cut Pro Media has established itself as the trusted partner for creators worldwide because we understand one essential truth:
Video editing is not just technical—it is emotional, contextual, and brand-driven.
- Industry-specific editing teams
- Fast turnaround without quality loss
- Affordable project rates and bulk plans
- Brand-matched style consistency
- Secure file transfers and confidential workflow
- Editors trained specifically for wedding, real estate, corporate, and creative content
- Scalable services for businesses ready to grow
Cut Pro Media does not change your style. We enhance it, protect it, and amplify it.
This is why videographers, agencies, and creators who outsource to Cut Pro Media consistently outperform those who attempt to handle everything in-house.
Conclusion
In 2026, outsourcing video editing is no longer a shortcut—it is a strategic necessity. The businesses that succeed are the ones that understand where their time is most valuable, what tasks can be delegated, and which investments yield long-term growth.
Outsourcing allows you to:
- Save time
- Reduce costs
- Increase creativity
- Scale confidently
- Deliver premium work consistently
- Strengthen your brand
- Increase profits
If you want your business to thrive in a competitive market, editing should not be holding you back. It should be propelling you forward.
Let Cut Pro Media handle the editing while you focus on what truly grows your business—vision, storytelling, and opportunity.
Your footage deserves more than a timeline. It deserves a partner who understands how to turn it into success. Cut Pro Media is that partner.
AI Color Grading vs Human Touch: Key Differences and Which One to Choose
AI Color Grading vs Human Touch: Key Differences and Which One to Choose
Introduction
AI color grading vs human colorist is a growing discussion in modern video production, especially in industries like weddings, real estate, and commercial filmmaking. Color grading shapes mood, atmosphere, and emotional tone, turning raw visuals into compelling cinematic experiences. But as artificial intelligence begins to influence every stage of post-production, filmmakers are now asking a crucial question: Is AI color grading ready to replace the human colorist, or does the human touch still matter?
The rise of AI-driven editing tools has made color grading faster, more accessible, and often more affordable. These tools can automatically correct lighting, match tones, and apply stylistic looks in seconds. Meanwhile, human colorists continue to offer something AI cannot replicate—creative intuition, emotional judgment, and the ability to understand the story behind the footage.
This article explores the key differences between AI color grading and human-driven grading, outlining where each excels, where each falls short, and how to decide which one is right for your project.
Understanding Color Grading
Color grading is the process of enhancing and stylizing video footage to create a visual tone that supports the story. It involves more than correcting exposure or balancing white levels. It shapes how the viewer feels. A warm tone can evoke romance, while desaturated tones may convey nostalgia or melancholy.
In filmmaking—especially in weddings and storytelling-driven content—color grading is not merely technical. It is emotional. This distinction is where the debate between AI and human grading truly begins.

What AI Color Grading Brings to the Table
AI-based tools have evolved rapidly. They can now analyze footage, detect inconsistencies, apply LUTs, and mimic professional looks within seconds. Their strengths include:
Speed and efficiency: AI can process large volumes of footage faster than any human. This appeals particularly to creators who handle multiple projects and strict deadlines.
Consistency: AI algorithms apply the same logic to each frame, ensuring uniformity across scenes shot in varying lighting conditions. It reduces human error caused by fatigue or oversight.
Affordability: Many AI solutions are integrated into existing editing platforms, making professional-style grading accessible without hiring a dedicated colorist.
Automation: AI tools can match shots, detect faces, adjust exposure, and even identify the subject—tasks that used to take hours are now completed automatically.
These advantages make AI color grading attractive, especially for high-volume industries like wedding videography, event coverage, or real estate marketing.
However, despite its capabilities, AI still functions on rules, not emotions. And that is where the limitations appear.
Where AI Color Grading Falls Short
AI can imitate style, but it cannot interpret intention. It cannot feel the emotion of a wedding vow or the tension of a dramatic scene. AI struggles when footage requires nuance shaped by story, tone, and personality.
Here are key weaknesses that prevent AI from replacing humans entirely:Lack of emotional awareness: AI understands pixels, not feelings. It cannot determine whether a moment needs softness, warmth, or creative contrast for emotional impact.
One-size-fits-most grading: AI often applies predefined looks. While visually appealing, these styles may not match the narrative or the couple’s personality. Trouble with mixed lighting and noise: AI can correct lighting but fails at complex scenarios that demand judgment beyond preset instructions.
Inability to adapt creatively: Humans draw from experience, taste, and artistic sensibility. AI works only within patterns it has learned.
For projects where emotional authenticity matters, AI alone cannot guarantee results that resonate.
What Human Colorists Offer
Human colorists bring something irreplaceable: perspective. They interpret footage through emotion, theme, and story.
Their strengths include:
Narrative understanding: Colorists reflect the mood of each scene rather than applying blanket changes.
Adaptability: Humans can address irregularities, creative imperfections, and unpredictable lighting that AI misinterprets.
Unique artistic style: No two human edits are the same. A colorist’s signature enhances brand identity and storytelling impact.
Collaboration: Colorists communicate with videographers, understand preferences, and adjust based on real feedback.
Emotional intelligence separates a well-graded film from one that simply looks corrected. Weddings, for instance, depend heavily on emotional tone. Human colorists know when to soften highlights, warm skin tones, or create dramatic contrast—not based on rules, but artistic logic.
The Human Touch vs AI: Direct Comparison
When comparing AI grading to human colorists, the difference is not which one is better—it is what each is better at.
AI excels when:
The workload is high
The turnaround time is short
The style is predefined and consistent
The project is technical, not emotional
Human colorists excel when:
Storytelling matters
Emotional authenticity is required
Creative expression is essential
Footage is unique, imperfect, or stylistically varied
The question is not whether AI can replace human colorists. It is whether your project demands more than automation can provide.

We Can Help You With Professional Video Editing.
Unlimited Revisions – Whatever changes are needed, send them through and we will Fix them.
Fast Turnaround Time – We are always available to meet the tightest of deadlines when necessary.
Risk-Free Trial – Send your first video editing project to us and if you are not 100% happy with the results we produce, you don’t pay!
Which One Should You Choose?
To determine the best choice, consider the project’s purpose, budget, and emotional weight.
Choose AI color grading if:
You produce high volumes of content
Speed is critical
Budget is limited
You require consistent, standardized output
Choose human color grading if:
Your film tells a story
Emotion is central to your message
You want a signature look
You expect personalized adjustments
Weddings, commercials, and narrative-driven content benefit from human colorists. Corporate and repetitive video tasks often function well with AI.
The ideal solution for most modern creators is not choosing one or the other—it is combining both.
AI handles the repetitive foundations, while human experts refine the emotional interpretation. This hybrid approach delivers efficiency without sacrificing artistry.
Why Professional Outsourcing Makes the Decision Easier
Professional editing companies like Cut Pro Media understand when to apply AI automation and when the human touch is essential. They bridge the gap between speed and artistry, delivering polished, emotionally resonant results without the compromises of a single approach.
Instead of investing time learning complex grading tools or relying entirely on automated systems, outsourcing provides:
Consistent quality
Faster delivery
Human-guided creativity
Access to advanced tools and expertise
Greater emotional depth in the final film
Clients receive a product that feels handcrafted rather than algorithmic.
Conclusion
AI has changed the landscape of color grading, offering unprecedented speed, consistency, and accessibility. Yet technology cannot fully replace human emotion, artistic vision, or intuitive nuance. The best wedding and commercial films are memorable not because they are perfectly corrected but because they are intentionally colored to reflect meaning.
AI provides efficiency. Humans provide interpretation.
A timeless film requires both.
For creators seeking the highest standard of storytelling and visual style, the solution is not choosing sides—it is choosing the right approach for the right purpose. And when artistic quality matters, the human touch remains irreplaceable.
About
We are a team of editors who specialize in wedding, commercial, and real estate video editing.
Services
Quick Links
Community
Subscribe to our newsletter today for the latest blog updates, and special offers.
© 2026 — Cut Pro Media. All Rights Reserved.
About
Ewebot have much planned for the future, working with great clients and continued software development.
Services
Community
Quick Links
© 2020 — Ewebot by GT3Themes. All Rights Reserved.


